Advanced authoring in Microsoft Word – Part 25: Creating Word vector graphics
Last time we saw that you can use Microsoft Word to create vector illustrations directly in documents. Let us give a few tips on how to do this:
In most illustrations, you use many different objects (shapes, text boxes, …). It is a very good idea to put such an illustration in a drawing canvas, so you get a single container to worry about in relation to the rest of the document.

In the last post, we saw the shape and formatting part of the Format Drawing Tools tab of the ribbon. But equally important is the arrange and size part:

-
Know your modifiers
When you draw a line [using the mouse], you can hold down the Shift key to fix the angle to integer multiples of 45° relative to the screen’s coordinate axes.
When you move a line, the Shift key forces a translation along either the horizontal or the vertical axis.
When you drag an endpoint of a line, the Shift key fixes the direction of the line.
When you draw a 2D shape (e.g., a rectangle or an ellipse), the Shift key preserves its natural aspect ratio (e.g., makes it square or a circle, respectively). The Ctrl key puts the ‘anchor’ point at the centre instead of at the opposite corner.
If you drag the handle at one of the four corners of a 2D shape, the Shift key will force uniform scaling, preserving the aspect ratio of the shape. The Ctrl key puts the ‘anchor’ point at the centre instead of at the opposite corner. (This modifier also works if you drag a handle that is not at one of the four corners.)
All ‘mouse dragging operations’ (with two small exceptions) try to snap objects to an invisible grid. To move freely, hold down the Alt key.
For example, if you have a complicated 2D shape and select its upper-right corner handle, while all three modifiers are depressed, you will scale the shape uniformly (preserving its aspect ratio), smoothly (not sticking the size of the shape to a discrete set of values), and with the centre of the figure fixed during the operation.
When an object is selected, you can move it with the arrow keys. The Shift modifier will resize the object vertically or horizontally instead of moving it; the Alt modifier, when used with the right and left arrow keys, will rotate. In all three cases, the Ctrl modifier will do the operation smoothly.
The circular green handle of a 2D object is used for rotation. Rotation is smooth by default, but the Shift key can make it discrete; the step size appears to be 15°.
A yellow square standing on one of its corners is used to alter a parameter of a ‘complex’ built-in shape.
If you want a number of equal-length lines (such as arrows), you can create one and simply copy-paste it.
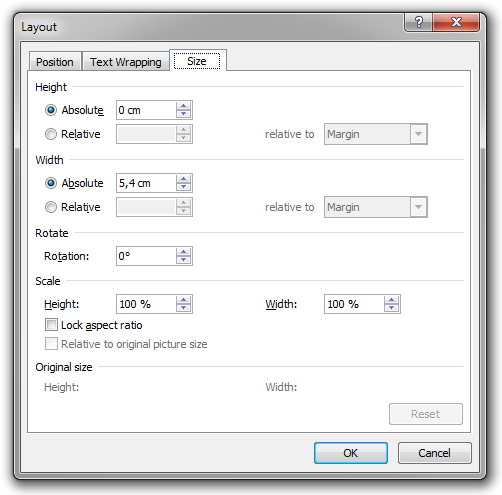
You can also set the lengths of lines (and, more generally, the dimensions of objects) using the Height and Width fields in the ribbon. To get more precise control, you can right-click an object and select ‘More Layout Options’. Here you can enter not only the width and height of the object, but also any angle of rotation in degrees. This is very useful. Notice that rotation is clockwise (which is very strange, but still…).

Warning! It is not possible to enter a negative angle, so if you want to rotate 10° anti-clockwise, you cannot enter a value of −10°. Instead, you have to enter 350°. (To me it appears as if a negative value will result in undefined behaviour…)
You can right-click a shape and select ‘Edit Points’ to edit the precise path which the shape is based on. Don’t forget to right-click nodes and edges.
In complex illustrations, it is often convenient to group related shapes into collections. If the related shapes are all selected, you can probably use the keyboard command Menu, G, G to do this quickly. (This might not work in your language version of Microsoft Word.)
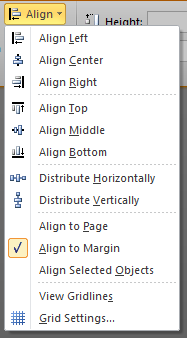
The Align commands are very useful.

Warning! These commands are strangely disabled if you work inside a drawing canvas (as you should do if you work with many different objects!). Hence, every time I want to create a complicated illustration, I create it directly on the text canvas (that is, not on a drawing canvas) of a new, empty, Microsoft Word document. When I am done, I select the entire illustration (that is, I select all the objects that make up the illustration), and copy it to a drawing canvas in the actual document I am working on. This way I do get the illustration inside a drawing canvas, but I can still use the align commands while creating the illustration.
Connecting shapes by curves that will follow the shapes automatically as they are moved is a fragile feature that seems only to be enabled within a drawing canvas.
An illustration may contain text boxes that may contain formulae. If you use text boxes to annotate objects in an illustration, you probably want to set ‘Shape Fill’ and ‘Shape Outline’ to ‘No Fill’ and ‘No Outline’, respectively.
To select an object that is obscured by text or by other objects (that might be semi-transparent), you can use the Selection Pane.
You must be smart, creative, and patient when you create complex Word vector illustrations. Much is possible, but you may have to use ‘tricks’ to get there.
